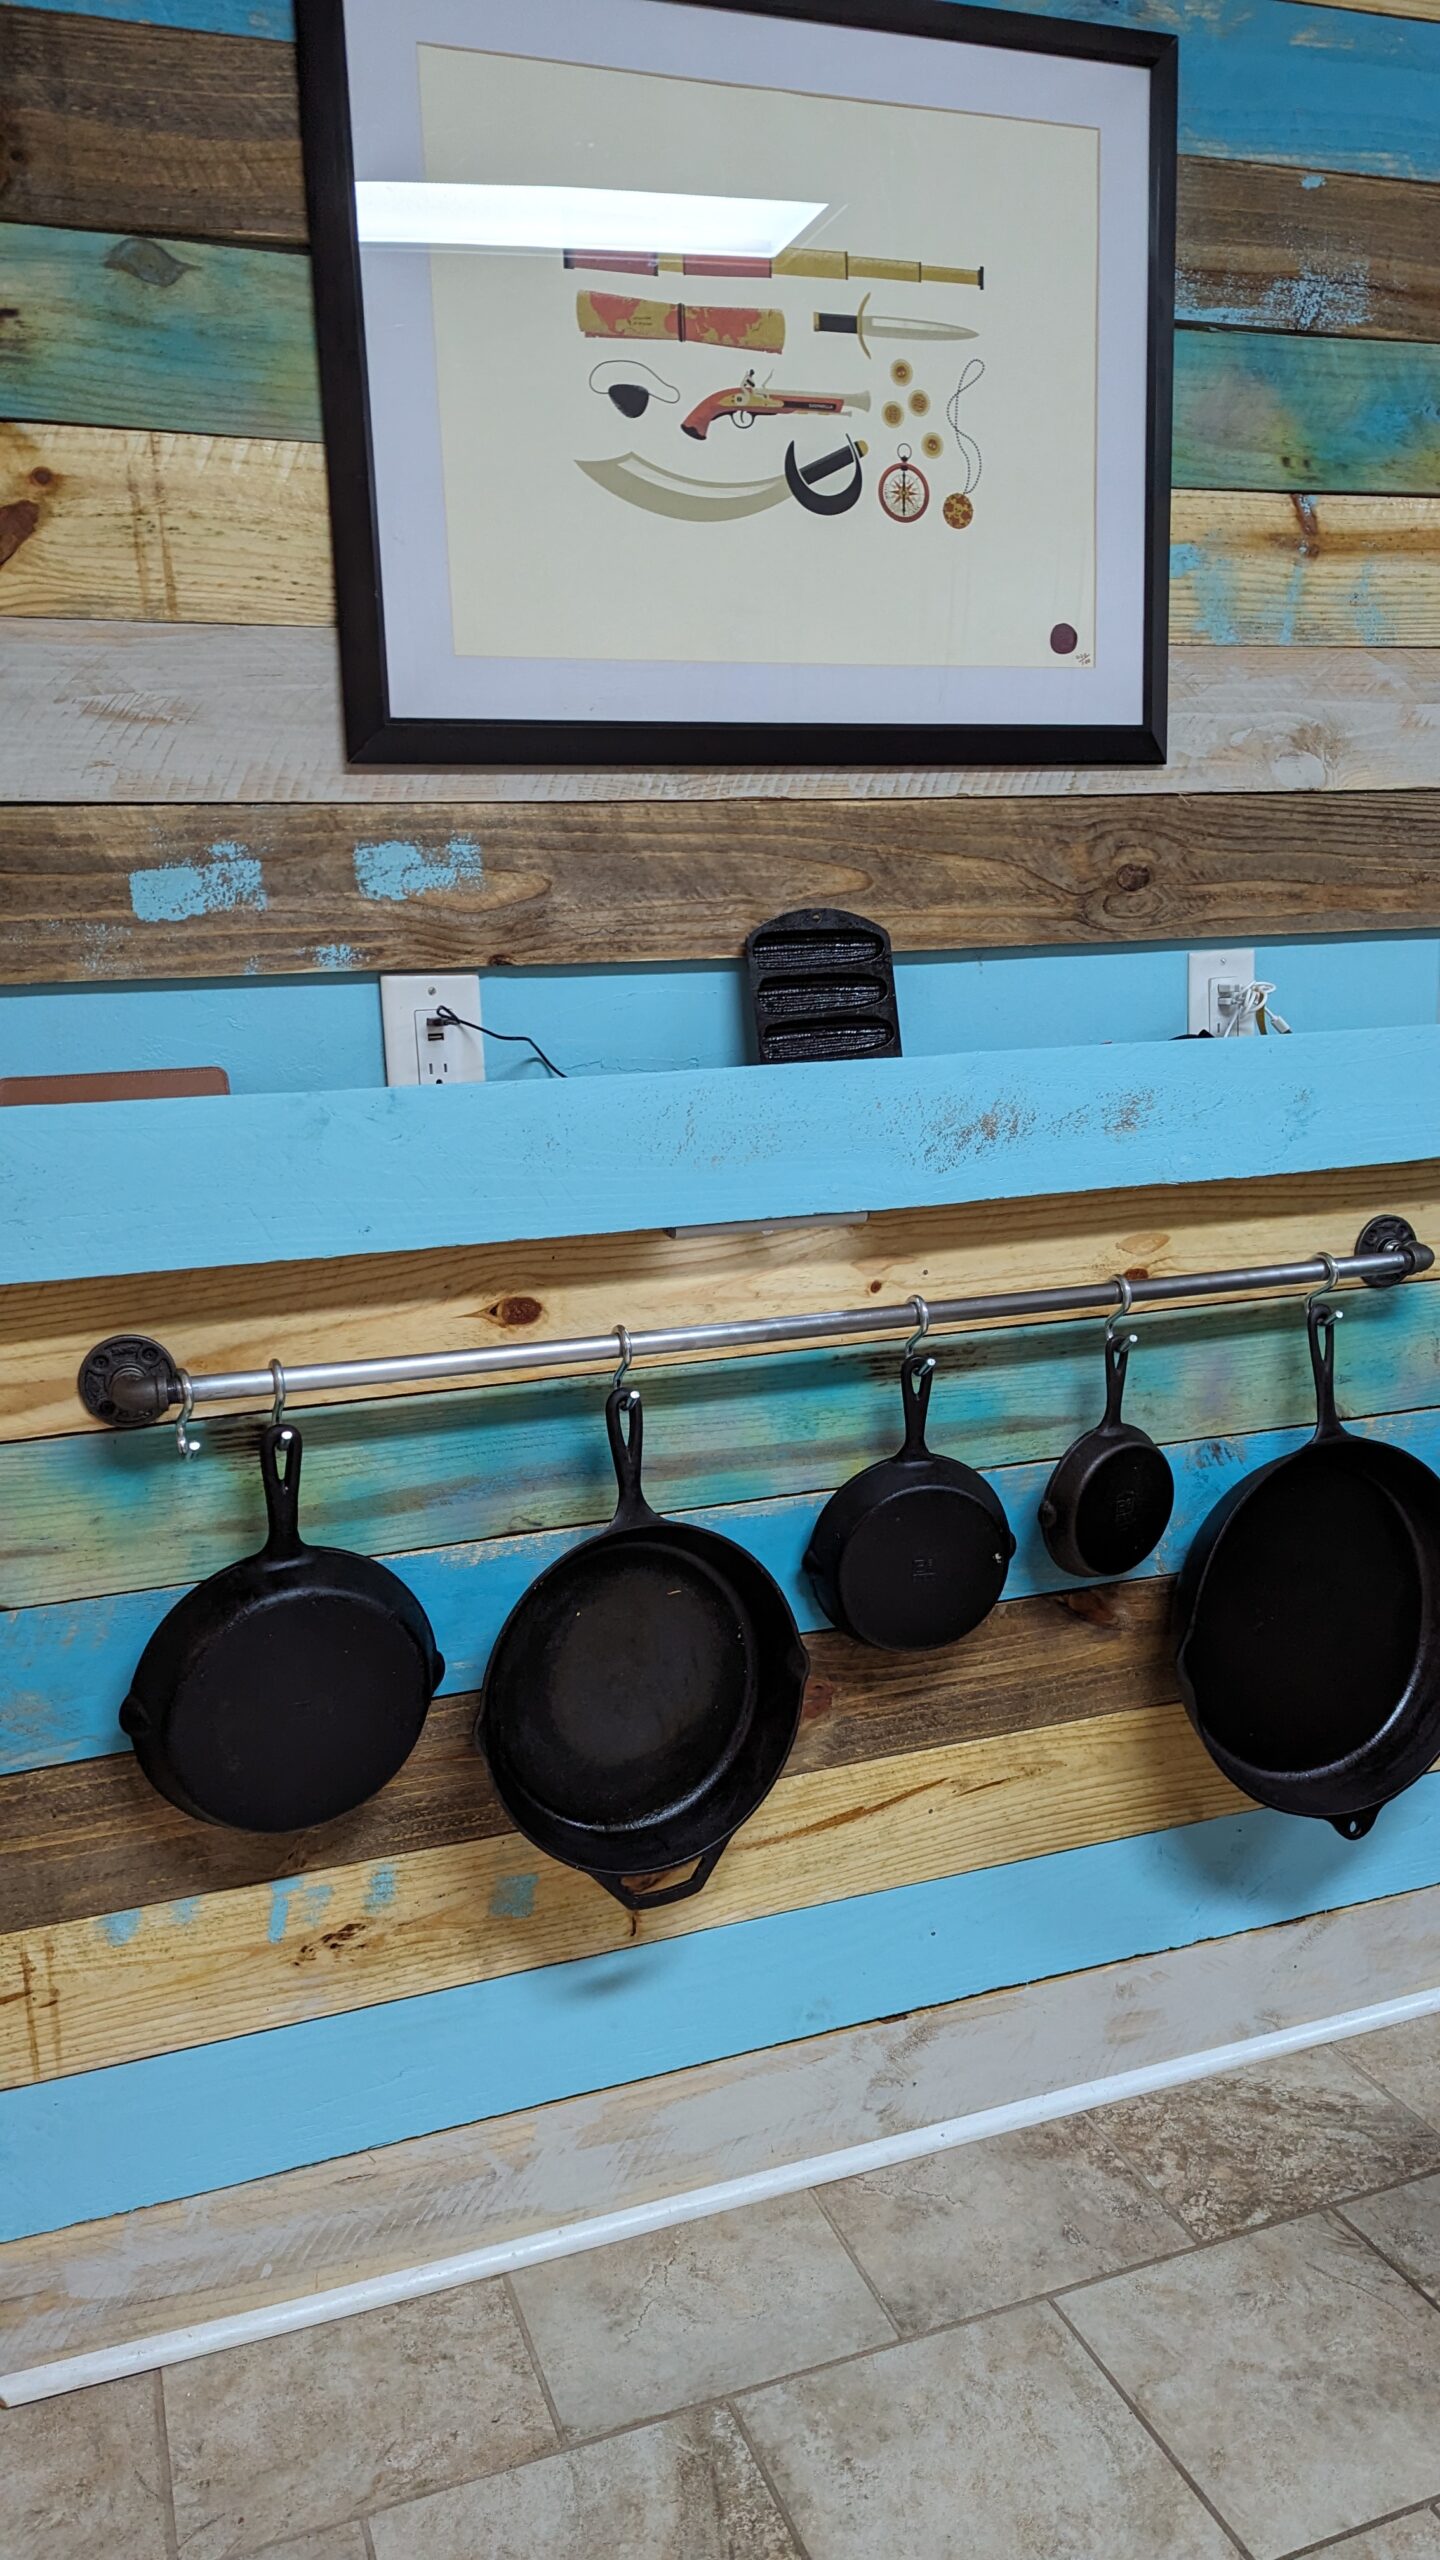
I created this cast iron wall setup right in my kitchen using nothing more than some inexpensive fence boards, basic plumbing pipe, and a little creativity. I love my cast iron collection, but finding a good way to store it that was both functional and fun took a little trial and error. Once I had the idea, the whole thing came together quickly—and now it’s one of my favorite parts of the kitchen.
DIY Cast Iron Wall
The wood is made from fence posts, which I cut and stained in alternating patterns to give it a rustic, weathered look that still feels bright and colorful thanks to the teal and natural wood tones.
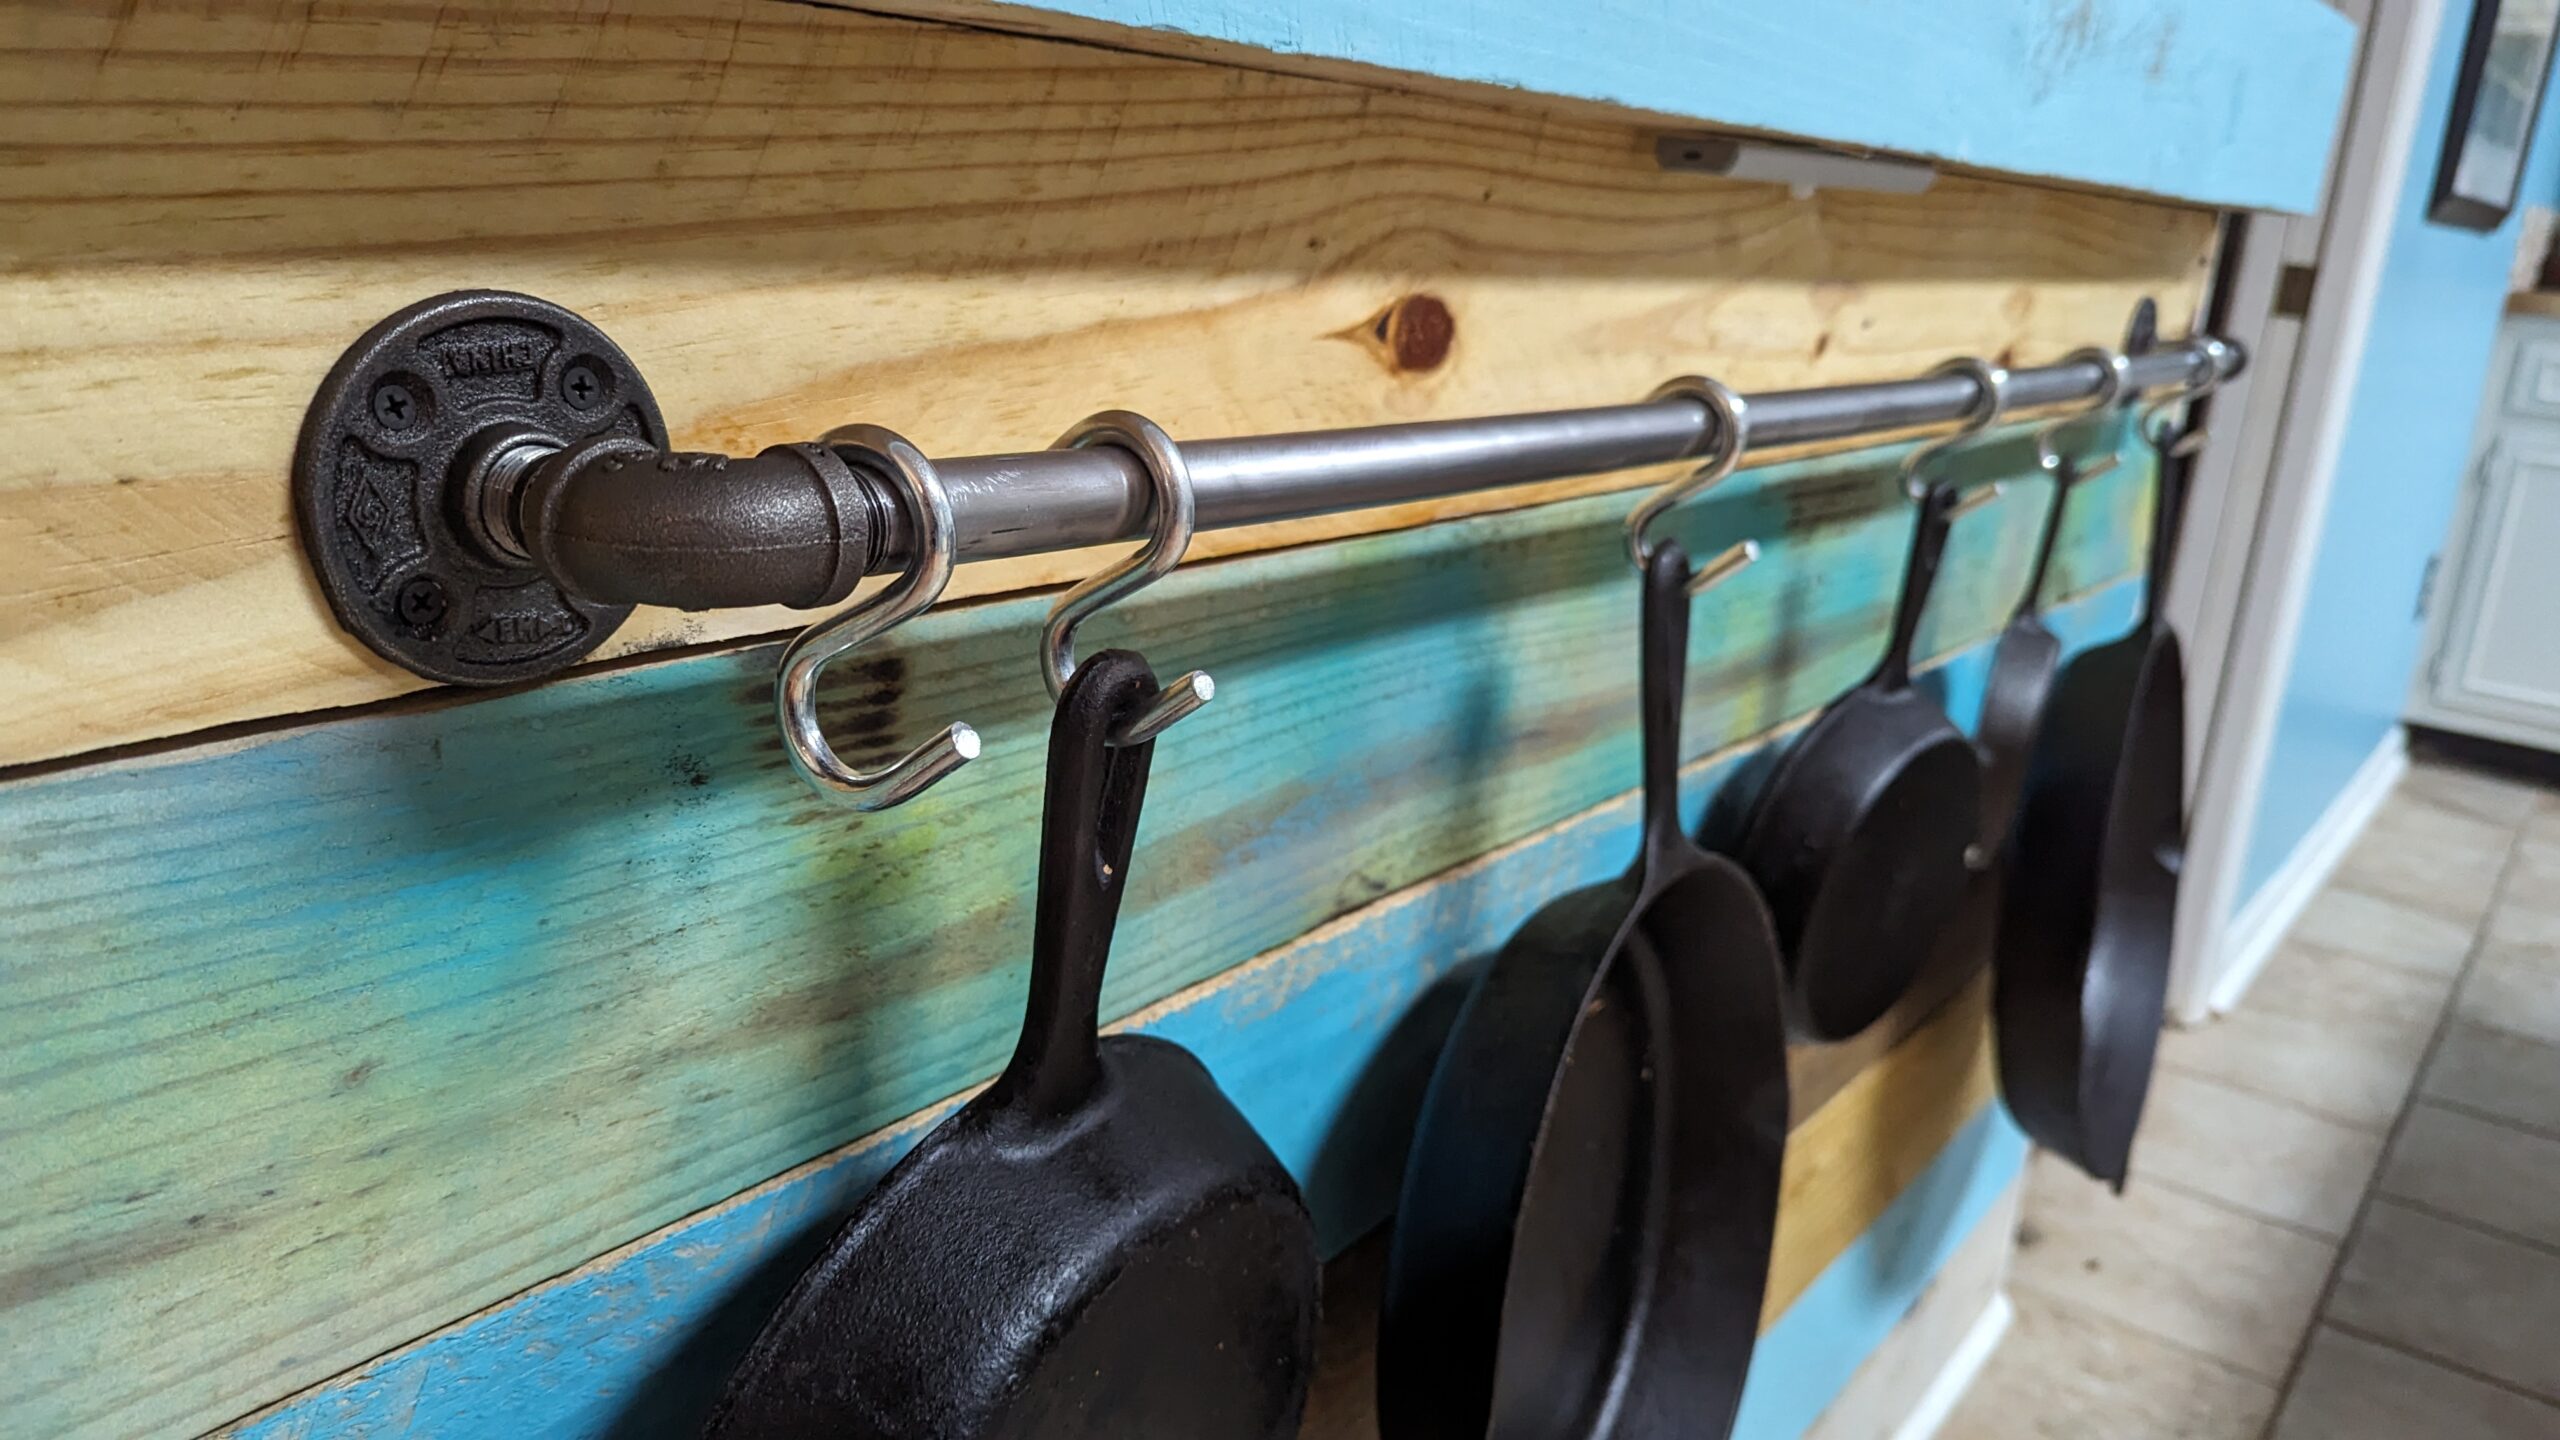
The cast iron pan holder itself is just standard plumbing pipe mounted securely to the wall studs, with sliding hooks that let me rearrange or grab what I need easily.
I also added a small board shelf between the rails to hold a few odds and ends—and it worked out perfectly as a charging station for small devices and kitchen gear.
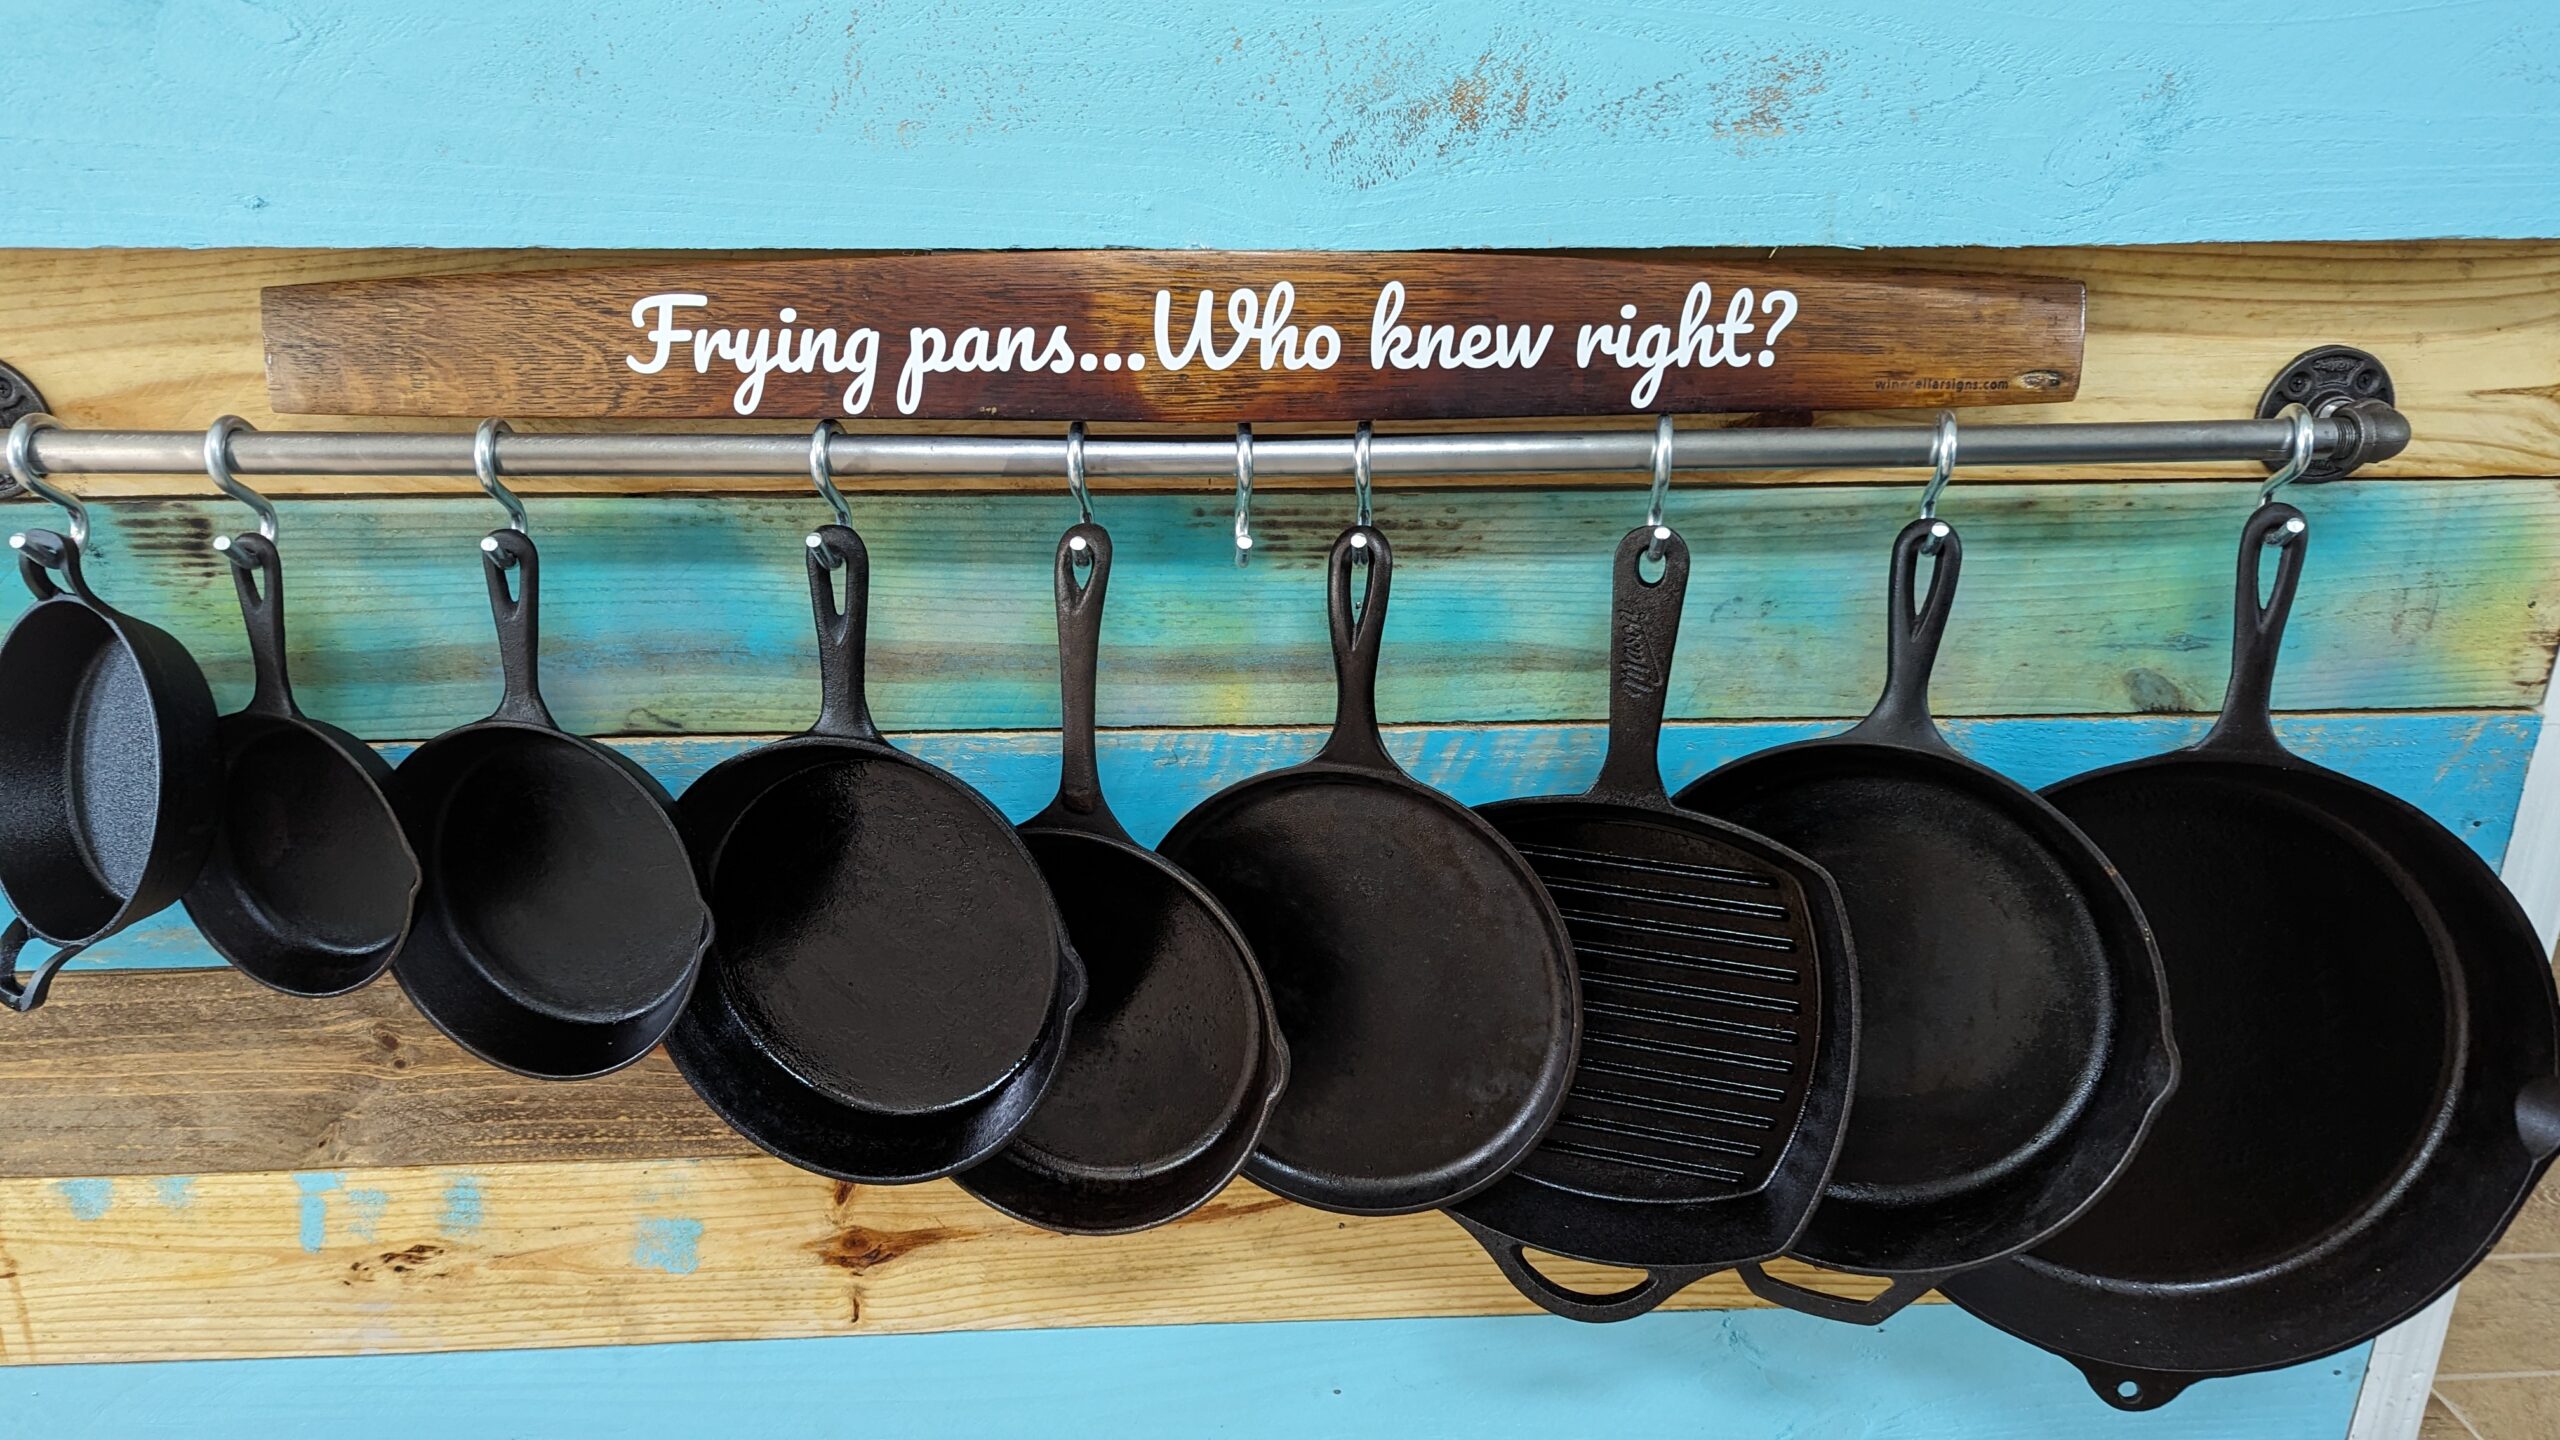
The finishing touch? That fun little sign up top. I added it later using one of my favorite sayings from a Disney movie…”Frying pans… Who knew right?”. It was made from an old wine barrel plank and gives the whole setup a little personality.
It’s practical, sturdy, and makes it super easy to grab the exact skillet or grill pan I need without digging through cabinets. Plus… it looks pretty dang cool too.
Tips for Creating Your Own Cast Iron Display
1. Find Your Studs First
Cast iron is no joke when it comes to weight. Use a stud finder and make sure your pipe brackets are anchored directly into wall studs. If you’re attaching a wood backer (like fence boards or pallets), secure that into the studs first, then mount your pipe into the wood.
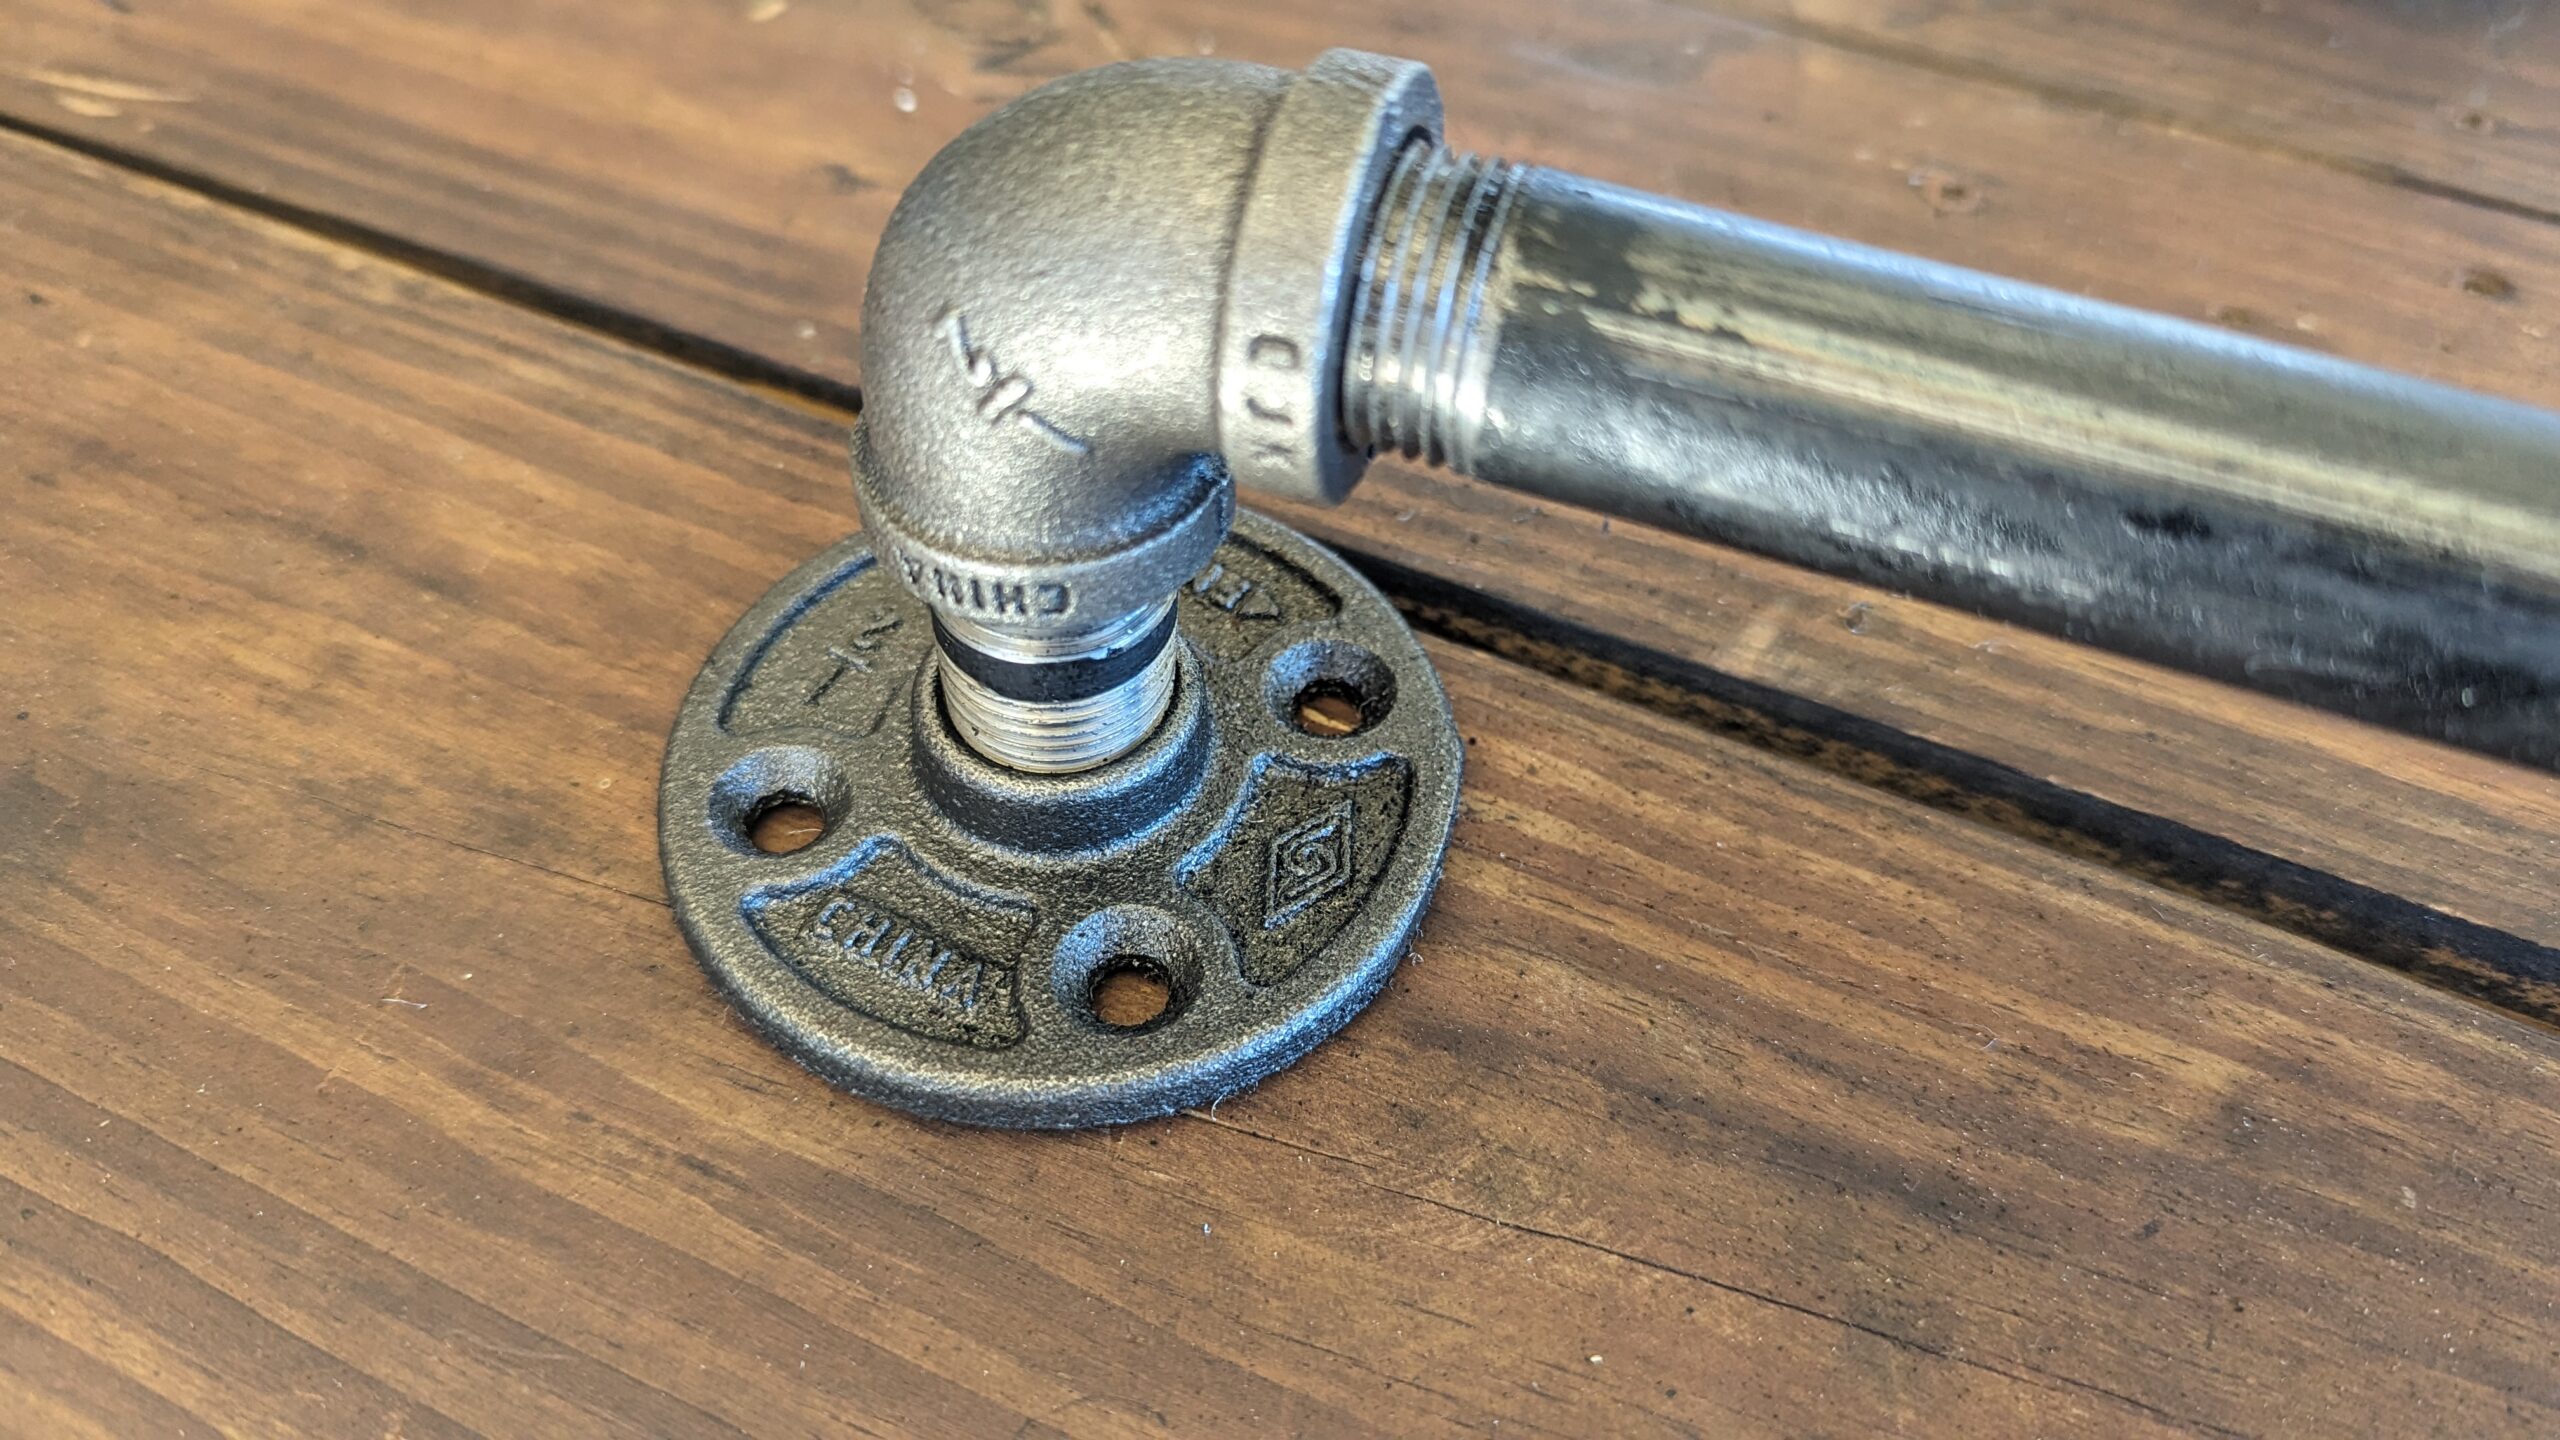
2. Use Real Pipe, Not Closet Rods
Closet rods and curtain rods won’t hold up over time. Head to the plumbing section of your local hardware store and get ¾” galvanized pipe, flanges, and elbows. It’s sturdy, affordable, and has a great industrial look.
3. Go Rustic with Reclaimed Wood
Old fence posts, pallet wood, or deck boards make the perfect backdrop. They’re usually free or cheap and already have that weathered character. Mix in a few painted or stained boards to give it contrast and color, like I did with the turquoise and natural wood tones.
4. Use S-Hooks for Flexibility
You can find heavy-duty S-hooks online or in-store. They let you easily move pans around, swap pieces out, or grab what you need while cooking.
5. Add a Shelf or Ledge
That middle board between the pipes? I turned it into a little charging shelf for small kitchen gadgets. You could use it for spice jars, timers, or even just as a phone holder while cooking.
6. Personalize It
Make it your own! I added the “Frying pans… Who knew right?” sign using a piece of a reclaimed wine barrel and lettering from an online shop. You could paint a quote, add hooks for utensils, or even hang a recipe clipboard.
7. Protect Your Wall (Optional)
If you’re worried about grease or oil splashes, seal the wood with a matte poly or clear coat. Or line behind the pans with something wipeable like faux tin panels or metal sheet.
8. Display What You Use
This isn’t just for show—hang the cast iron you use often. It keeps things handy and encourages you to use more of your collection instead of digging through cabinets.
This is one of those functional DIYs that adds charm and saves space. Once it’s up, you’ll never want to go back to stuffing pans in drawers again!